Displaying Power BI reports to the public on Power Pages or other web platforms can provide significant value for businesses and organizations aiming to share insights with external users. However, the implementation comes with several important factors to consider, especially for anonymous users.

Dynamics 365 Tech Blogs
Showing posts with label Power BI. Show all posts
Showing posts with label Power BI. Show all posts
Comprehensive Guide to Power BI Workspace License Modes and User Access
Introduction
Microsoft's Power BI platform offers a range of features to meet the needs of diverse business analytics use cases. However, understanding the licensing requirements is crucial to accessing, sharing, and collaborating on reports and data effectively.
Comprehensive Guide to Power BI and Dynamics 365 Integration
This article provides a detailed overview of integrating Power BI with Dynamics 365, focusing on dashboard visibility, user permissions, and licensing requirements.
[TIPS] Set the Dynamics Maximum Value of Gauge Chart
[TIPS] Set the Dynamics Maximum Value of Gauge Chart
[Tutorial] Power BI Data Refresh
Power BI Data Refresh
In this tutorial, we will see what is data refresh in Power BI and how to schedule refresh in Power BI. And also we will discuss
Embed a Power BI report in a model-driven app main form
Embed a Power BI report in a model-driven app main form
You can use Power BI reports in Power Apps model-driven apps to bring rich reporting and analytics to your main forms and empower your users to accomplish more. This unlocks the power to aggregate data across systems, and tailor it down to the context of a single record.
Power BI Date Range Slicer
How to Create a Power BI Date Range Slicer?
Slicer visuals include powerful filtering options for date data types, such as a graphical date picker, criteria before and after, and relative dates such as the last two weeks.
Power BI Date Filter
Creating Power BI Date Filter
In this section, you will go through the steps to create a relative data range filter to add to your report pages or your entire report. The following steps to add Power BI Date Filter are listed below.
Step 1: Create a Date Range Filter
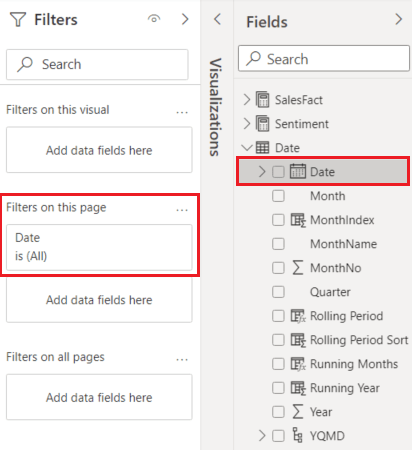
- Open your report in Power BI and from the “Fields” pane, select the “Date” field.
- Now, drag it to the “Filter on this page” field or “Filters on all pages” from the “Filters” option.
- You can also change the relative data range options, similarly, you can customize in Power BI Date Slicer.
Step 2: Configuring Date Range Filter
- For this, select the “Relative date” option from the “Filter-Type” drop-down menu.

- After selecting the “Relative Date” option. It will provide you with the 3 options under the “Show items when the value” section for configuring Power BI Date Filter.

- These are similar options to what you configured while creating Power BI Data Slicer.
- Now, here in the middle field of Power BI Date Filter, you can choose a number to define the relative data range.
- Next, click on the “Apply filter” option
Power BI Date Slicer
What is Power BI Date Slicer?

Power BI Date Slicer and Filter allow users to apply a time-based filter to any columns in your data. There are many Power BI Date Slicers, and each one has a different purpose. It helps users filter flexibly select between date ranges to show only data of a particular range. After refreshing the data, the relative period will automatically get applied for the relative date constraint.
When to Use Power BI Date Slicer?
Power BI Date Slicers are easy to use and provide flexibility to users in filtering data based on dates. Users should use Slicer for the following reasons listed below:
- So that users can view the currently filtered state without opening a drop-down list.
- It allows users to create focused reports by applying Power BI Date Slicers and Filters next to the important visuals.
- Users can filter the unneeded and hidden data tables.
- It helps display the commonly used filters on the report canvas for easier access.
Creating Power BI Date Slicer
Now that you have understood about Power BI Date Slicer. In this section, you will learn how to create and use Power BI Date Slicer and Filters. You can use Power BI Date Slicer just like any other Power BI Slicer. The following steps to create Power BI Date Slicer are listed below.
Step 1: Create a Slicer
- Open your Power BI and load the dataset.
- Now from the Vusializations tool section, select the “Slicer” option to create a report with Power BI Data Slicer.
- Then from the “Field” value, choose the column to which you want to add Power BI Date Slicer.
- For this tutorial, “Purchasing Date” is used for Power BI Date Slicer.

- Now, click on the Power BI Date Slicer from your canvas and then click on the upper-right of the Slicer visual.
- If the column has data then it will show the “Relative Date” in the drop-down menu.

Step 2: Setting Relative Date
- Here, select the “Relative Date” option to add Power BI Date Slicer to the column.
- Then, select the “Settings” option.
- In the first field of the Power BI Data Slicer settings, you can choose the following option listed below.
- Last
- Next
- This

- In the next field of Power BI Date Slicer, you can choose a number to define the relative data range.

- In the third set, you can select the date measurement. It has the following option listed below.
- Days
- Weeks
- Weeks (Calendar)
- Months
- Months (Calendar)
- Years
- Years (Calendar)

- For example, if you select the “Months” option from the last field of Power BI Date Slicer settings and 2 in the middle field.
- So, if today is 14 March, then the visual data constrained by the Slicer will show you the data of the previous two months.
- The data will start from 15 January to 14 March. But if you select the “Months (Calender)” option on the last field of Power BI Date Slicer, then it will show data from 1 May to June 30, without taking the date into consideration.
Subscribe to:
Comments (Atom)